Peekachello Art

project

Tight view of fireplace screen

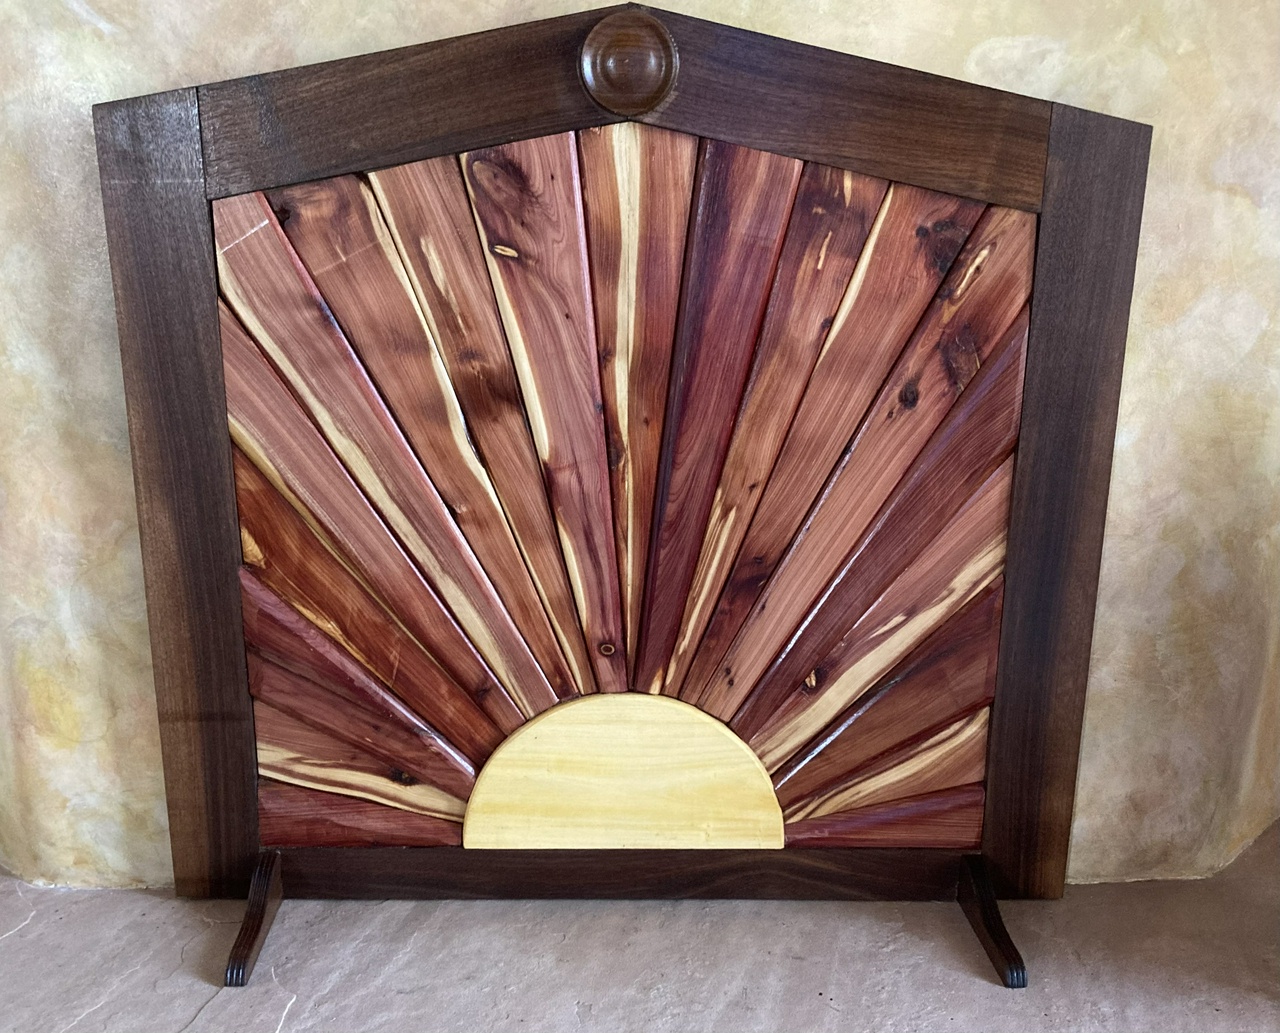
I built a screen for our fireplace recently, and am fairly happy with the result. The screen is for times when we’re not using the fireplace, since it looks dirty, and when the wind gusts, sometimes the damper blows open, and then we get a cold wind into the living room. This also greatly reduces the noise from wind blowing across the top of the chimney.

Two years ago, we got the front of our fireplace painted by a local artist. It’s a very nice result, but especially with that fancy paint-job, we wanted something that would look better than the fire-stained firebox.

Wider view of fireplace screen in place on the hearth

The screen has a few features that are unique.

The hearth sits a couple inches above the floor of the firebox, as is typical. This provides a lip which I use to keep the bottom of the screen from sliding forward.

Close-up of the fireplace hearth, and the step down into the firebox

I cut a lip and curved edges on a board to sit on the lip of the hearth, and then built the frame up from there.

Close-up of the bottom of the fireplace screen, showing the lip which fits into the firebox while most of the screen sits on the hearth

The frame is walnut, and around the back edges of it, I’ve put a three-layer-thick roll of felt, which can lean against the painted front of the fireplace without damaging it. The felt is simply stapled in place, first the innermost layer, then the entire roll is stapled right next to the MDF backer, which should prevent the staples from damaging the paint on the fireplace.

Back of the fireplace screen, showing the felt border which protects the face of the kiva and also seals out drafts

The center of the frame is filled with a piece of MDF, which gave me a support for the juniper “rays” and the citrus-wood “sun.” They are simply glued to the MDF backer.

View of fireplace screen while in construction, showing the MDF backing layer in the frame

The juniper rays are all of different thicknesses. Rather than mill them all down to the same thickness, I intentionally left some of them thick so I would have more visual interest in the surface of the screen. The rays are all thinned down to roughly a quarter inch where the central sun sits, glued onto the rays.

Close-up of the rays, showing how they are of different thicknesses and chamfered on their edges

And finally, the completed screen wanted to tip forward due to the distribution of weight in it and the uneven hearth, so I added a couple feet to the front, which I glued in place only after everything else was completed, adjusting the angle of the feet to hold the top of the screen tight against the fireplace.

Close-up of the anti-tip foot of the fireplace screen

The finish is tung oil, followed by a few coats of shellac (between four and nine, depending on which part of the screen), followed by three-five coats of Tried and True Varnish Oil. I thought about using a more traditional varnish, but the difficulty of keeping that dust-free in my shop convinced me to use the slower, but more friendly oil varnish.

That’s all. It was about a month from cutting the first frame section to setting the completed screen in place on the hearth, but I received the juniper from a friend almost three years ago, and have been thinking and sketching designs for most of the time since then.

#woodworking #project

Discuss... Or contact me in the fediverse @davepolaschek@writing.exchange

Russian olive bowl with lid

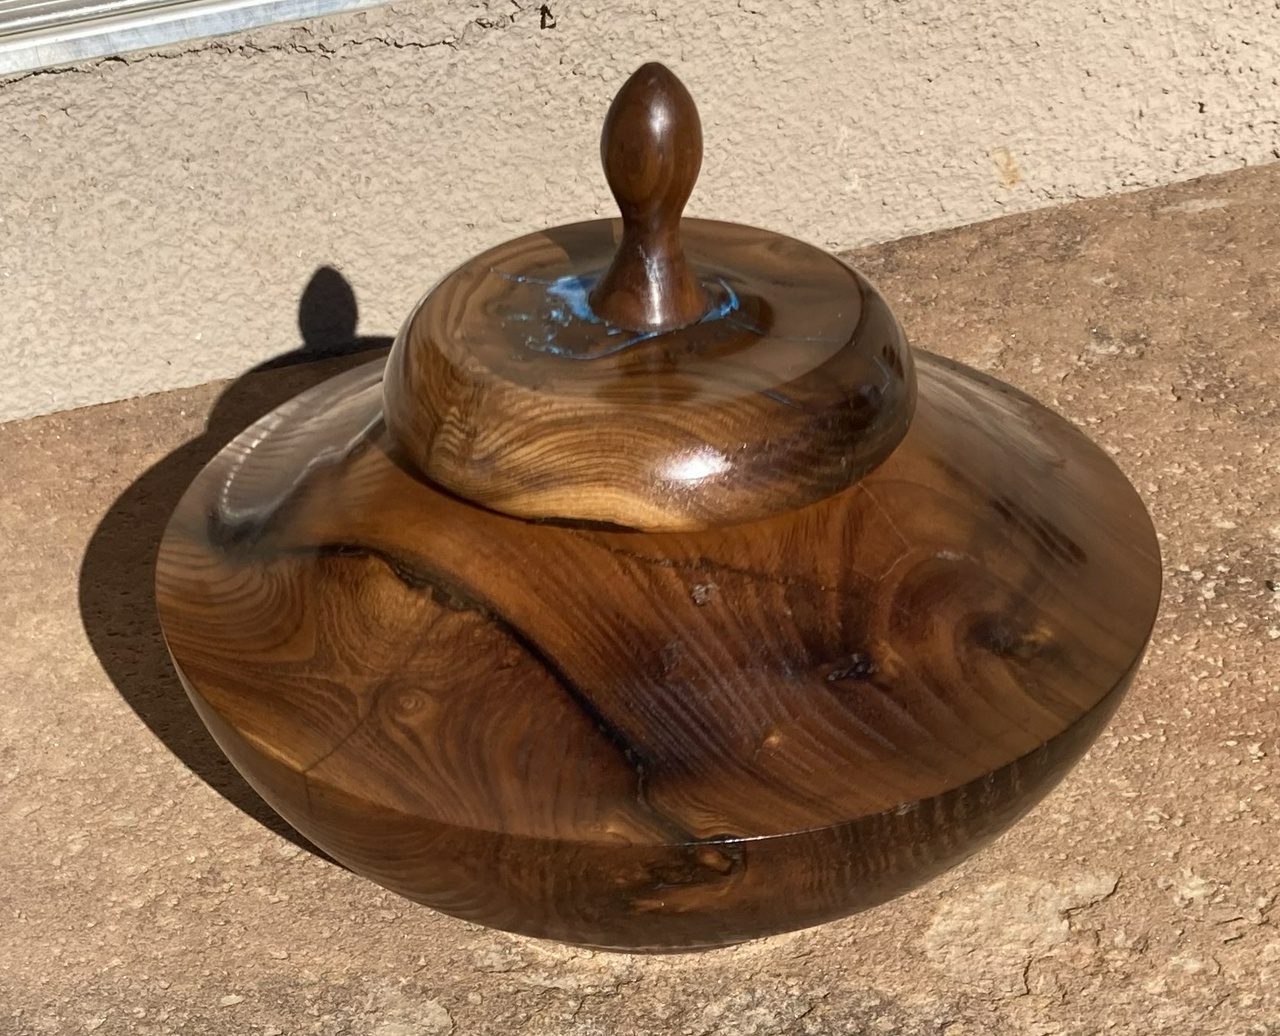
Got some Russian olive from a friend last Saturday. This bowl came out of one of the pieces. There are two cracks that wanted to come apart as I was turning it, and the shape was largely dictated by another crack that did come apart (and which put a dent in the ceiling of my shop).

Read more...

Completed outside of the book Inner book paper installed, view of the inside

I've been wanting to learn more about bookbinding for a while, so when a Surprise Swap came up on Craftisian, I decided part of the build would be a box built with some bookbinding techniques.

Read more...

Cholla and resin lamp, unlit

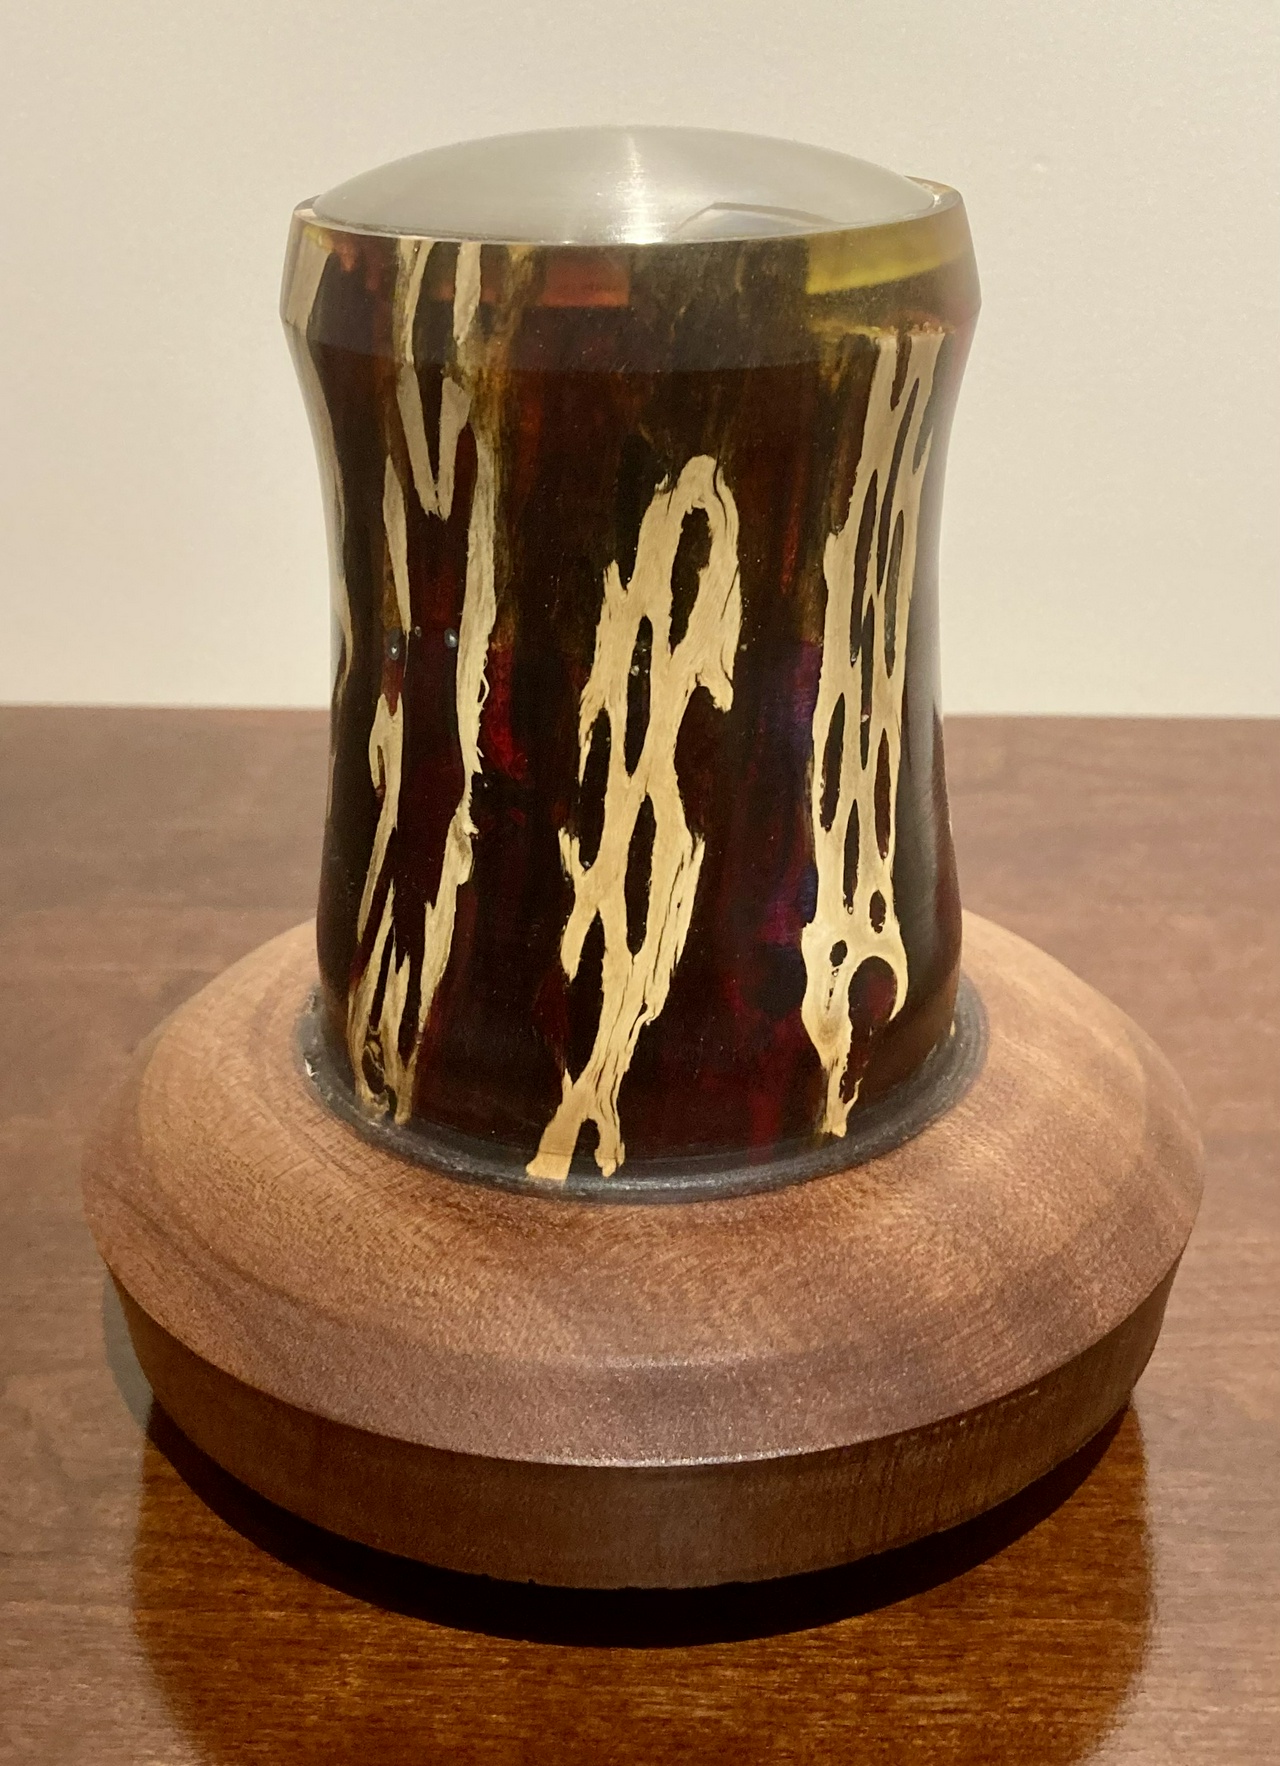
After making a couple bedside lamps, I wanted to make a version more suitable as a nightlight. This is the result, a lamp in which the LEDs shine through the resin, illuminating it from within. The light is a yellow glow that turns red farther down into the resin. Not perfect, because the hole in the resin for the batteries is slightly (less than a millimeter) too small, so the battery case is protruding a bit, but it’s usable, and I can always fix it later.

Read more...

Front of car key fob

Recently, the remote fob for my truck cracked. The plastic case lasted about 14 years, and gave out pretty catastrophically. So I took it apart and looked at how the case was constructed and figured I could make one out of wood that would probably outlast the truck, which is getting some rust spots from its time in Minnesota.

Read more...